What are the Benefits of Creating a Storefront Child Theme
Let’s imagine that you want to make a change to your WooCommerce store, if the change can’t be made via options available in the WordPress/WooCommerce admin, then you’ll need to write/alter some code or CSS files.
If you’ve done any coding in the past your first instinct will probably be to find the file that you need to change and start adding/editing code, but this is not a good idea in WordPress because
Click here for more details about the "Learning WooCommerce Development By Example" book
- It’s reasonably rare to change one of the WordPress core files, as WordPress uses a system of filters and hooks, so often when code changes are made it will be via a hook or filter. This may seem confusing for now but we’ll look at it again later
- WordPress and WooCommerce update regularly, and it’s possible that if you change file directly it will be overwritten in a future update, you could then find that any changes you’ve made disappear from your store in the blink of an eye (or the installing of an update)
Child themes solve the problems above by
- Providing a safe location where you make changes to files safe in the knowledge that they won’t be touched by any updates
- Providing a mechanism whereby WordPress will check your child theme for a file before it loads it from the main theme
It’s going to be easier to understand some of the concepts above with worked examples, so let’s go-ahead and create a Storefront child theme.
How to Create a StoreFront Child Theme
To demo this I’m going to use a site running on Local by Flywheel on a Windows machine.
The first thing to do is to navigate to the “\wp-content\themes” of your website, on my machine, it looks like this

We’ll then create a directory for the child theme, for the purpose of this demo I’m going to call it “hardworkingnerdstorefront”

We then need to create a file in the directory called “style.css”

We then need to add some content to this file that will help WordPress identify our child theme, here’s what I added for this example
/*
Theme Name: Hard Working Nerd Storefront Child Theme
Version: 1.0
Description: Hard Working Nerd Storefront Child Theme Example.
Author: Ian
Author URI: https://www.hardworkingnerd.com
Template: storefront */
The “Theme Name”, “Version”, “Description”, “Author” and “Author URI” fields should all be fairly self-explanatory, the “Template” field is the really important one here as that tells WordPress what to use as the base theme for our child theme.
If we look back at the image of the “\wp-content\themes” directory we can see it lists the following theme directories
- storefront
- twentynineteen
- twentytwenty
- twentyseventeen
- twentysixteen
We could use any of these directory names as the value for “Template” and that would cause WordPress to use that theme as the basis for our child theme. In this example, we want to use the “storefront” theme so we provide the value “storefront” for “Template” in our “style.css”.
Activating the Child Theme
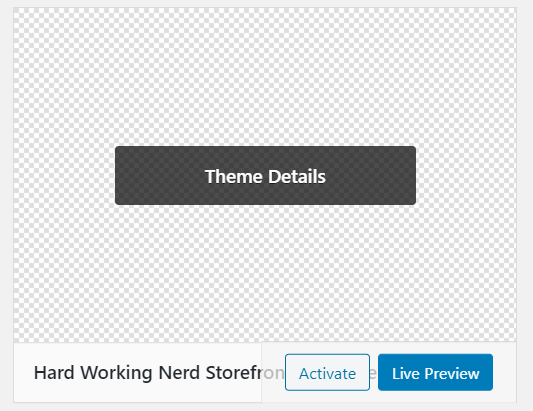
To activate your child theme, from the WordPress admin area choose “Appearance -> Themes”, your theme should then be visible

As you can see, because I went with quite a wordy title we can see a bit of the title of the theme but we can tell that it’s definitely our theme, if we now click the “Activate” theme WordPress will start using our theme.
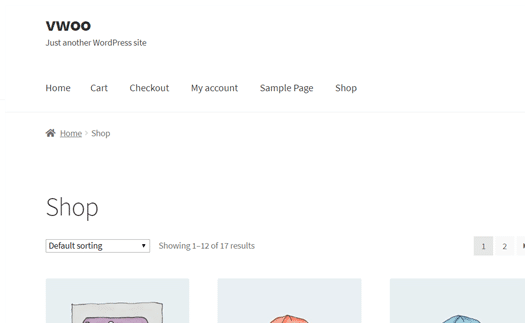
Once our theme is activated, if we take a look at the “shop” page in our store then it should look exactly as it did when we had the “Storefront” theme selected

this is because we have not yet modified anything in our theme that will override anything in the “Storefont” theme, we will start making modifications to our theme in the next section.
How to Upload Your Theme to a Remote Site
In the example we have been looking at so far we have done everything locally, but what if we wanted to create a child theme on a remote site (i.e. a website that was hosted on a server). In this scenario, we would have two options –
FTP
If you have access to your site via FTP you could follow the steps above using your favorite FTP client. An FTP client should allow you to create a directory, name it and create a “style.css” file with your desired values, you should then be able to activate the theme as in the example above.
Upload your Child Theme as a Zip File
You can also upload your child theme as a zip file, to do this create your child theme locally as we have done in the example above, once you’ve created a directory and added a style sheet file then create a zip file from your directory. The easiest way to do this on Windows is to right click your directory

Then choose “Send to” -> “Compressed (zipped) folder”, this should create a zip file with the same name as your folder

Now if you go to “Appearance -> Themes” in the WordPress admin dashboard

and click the “Add New” button

the the “Upload Theme” button you’ll be prompted to upload a zip file

If you choose the file that we just created then it should be possible to activate your new child theme as we did before.
What Changes Can I Make with my Child Theme?
Style Changes
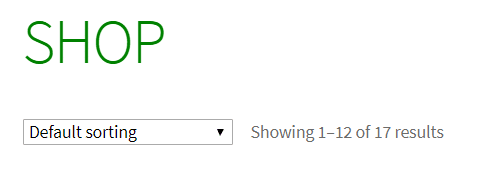
As we already have a “css” file in place adding style rules to our new child theme is an easy task, let’s say that we want to change the header on the shop page, so it’s bigger, greener and in capitals.

Then we can add the CSS code below to the “style.css” file
h1.woocommerce-products-header__title.page-title {
    color: green;
    text-transform: uppercase;
    font-size: 50px;
}
The shop title will then be permanently changed, as long as our child theme is in place and activated.
Changes via the functions.php File
As mentioned earlier, WordPress and WooCommerce implement a system based on filters and actions that allow you to change the behavior of the code without having to directly alter the files that contain the PHP code.
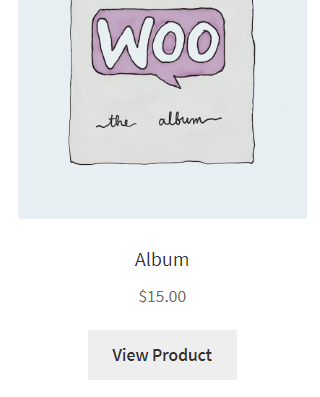
As an example, let’s consider that we want to remove the “Add to Cart” button on the shop page and replace it with a “View Product” button, the new button should send the user to the product’s details rather than adding an item to the cart.
We can do this by firstly creating a file called “functions.php” in our child theme folder, then adding the following code to the file
<?php
add_filter( 'woocommerce_loop_add_to_cart_link', 'hwn_replace_add_to_cart_button', 10, 2 );
function hwn_replace_add_to_cart_button( $button, $product  ) {
    $button_text = __("View Product", "woocommerce");
    $button = '<a class="button" href="' . $product->get_permalink() . '">' . $button_text . '</a>';
    return $button;
}
Once this code has been added when we navigate to the “Shop” page we should see the new button in place

Changes made by Altering Files
It is also possible to make changes by altering code in files, as mentioned earlier it is not a good idea to directly change the core WordPress/WooCommerce files as if the files are changed in a later update any changes we have made will be wiped out.
Child themes give us an opportunity to change files without altering the core files, let’s take a look at how this works.
On the product details page in WooCommerce an SKU code is displayed

We will use our child theme to remove the SKU by changing a file.
The first thing to do is to find the file that contains the code that adds the SKU code to our page, the code is contained in this file –
https://github.com/woocommerce/woocommerce/blob/master/templates/single-product/meta.php
At the time of writing the code that displays the SKU Code starts on line 28 and ends on line 32 of the file

So that is the code that we need to remove, but we first need to add the file to our child theme. In my local WordPress site, the file exists here –
\wp-content\plugins\woocommerce\templates\single-product
to make a copy in our child theme folder we need to copy the file structure from the “woocommerce” folder and remove the “templates” folder here’s a screengrab of the file in the correct folder in my child theme

Just make that a bit clearer, we copied the file from
\wp-content\plugins\woocommerce\templates\single-product\meta.php
to
\wp-content\themes\hardworkingnerdstorefront\woocommerce\single-product\meta.php
Following the convention above it is possible to replicate any of the files contained in the “woocommerce” folder in our child theme.
If you open the “meta.php” file in a text editor it actually contains instructions of how to copy it to a child theme

If we now delete lines 28-32 in our copy of the file and visit the product details page again then the SKU code should have been removed.

As well as altering WooCommerce files it is also possible to change files in the Storefront theme itself, let’s take a look at the “header.php” file

If we copy the file from the “storefront” theme directory –
\wp-content\themes\storefront
to our child theme directory
\wp-content\themes\hardworkingnerdstorefront
Then we can make changes to the file and they will appear in our store as long as our child theme is activated, to demo this functionality we” just add another div to the header

We should then see our changes when we view the store in a browser

A Note About Enqueuing Styles
If you read documents about creating a child theme you may see people mentioning enqueuing parent style sheets, in some cases you need to do this to ensure any styles contained in the parent theme are pulled into the child theme.
I’m not going to go into this in any great detail as I think it will only create confusion, and it’s not really in the scope of this article, the only thing to take away about this is if you are creating a child theme based on Storefront you do not need to worry about adding parent style sheets as code has already been added to the main Storefront theme that takes care of all this for you.
If you’d like further info on this, just drop a comment into the comment section and I’ll add some more info.
If you want to read the section in the WordPress Theme Developer Handbook about enqueuing styles you can find that here.
Is There a Way to Add Permanent CSS and Code Changes Without Creating a Child Theme
There is no way to edit files in WooCommerce or a parent them without creating a child theme, but there are a couple of plugins that will allow you to make modifications without creating a child theme.
Code Snippets – Allows you to add code snippets via the WordPress admin area
Simple Css – Allows CSS to be added via the admin area of your site, also allows CSS to be targeted at specific pages
How to Add Javascript to Your Child Theme
In this final section, we’ll take a look at how to add some Javascript to our child theme, to do this we’ll need to –
- Create a Javascript file and add it to our theme
- Add some code that loads the Javascript file into our site so the code gets executed in the browser.
We’ll begin by creating a “scripts” folder in our child theme and adding a file called “examplejavascript.js”

We’ll then add some really simple Javascript (that you probably wouldn’t want to use on a production site)
$(document).ready(function() {
    alert("Hello there!" );
});
Now we have some Javascript we just need to add it to our pages, to do that, we’ll add the code below to the “functions.php” file in our child theme
function hwn_child_theme_add_javascript_scripts() {
    wp_enqueue_script( 'example-js', get_stylesheet_directory_uri() . '/scripts/examplejavascript.js', array( 'jquery' ),'',true );
}
add_action( 'wp_enqueue_scripts', 'hwn_child_theme_add_javascript_scripts' );
Here’s what the code does
- Uses the wp_enqueue_script function to add our Javascript file
- The first argument passed to the functions identifies our javascript file, the second argument tells WordPress where to find our file (notice that we use the get_stylesheet_directory_uri() function to get the path to our child theme), the third argument lets WordPress know that our script has a dependency on jQuery, we pass false to the fourth argument so WordPress adds a version number our script, and finally, we pass true so WordPress will load our script in the site’s footer)

https://wordpress.stackexchange.com/questions/306604/adding-javascript-to-child-theme
Click here to enroll in our Free WooCommerce Coding Course

