The Problem
Adding a custom field to a product in WooCoomerce is a very popular request, and whilst it might seem a little daunting to add a field and then get the data entered into the field to display throughout the cart, order, and back-end order process we can actually accomplish the task using only a few actions and filters.
Let’s take a look at what we need to.
Click here to enroll in our Free WooCommerce Coding Course
The Solution
For the purposes of this solution let’s imagine we want to add a gift note field to all products in our store, if users choose to populate the gift note field then we’ll display it in the cart screens and the order confirmation screens on the front-end and then it will also be available to back-end users.
Adding the Field to the Product Screen
We’ll add our field using the woocommerce_before_add_to_cart_button action hook
function hwn_add_custom_option(){
   $value = filter_input( INPUT_POST, 'gift_note' );
   ?>

   <p>
        <label for="gift_note"><?php _e( 'Gift Note:', 'hwn' ); ?> </label><input type="text" id="gift_note" name="gift_note" placeholder="<?php _e( 'Enter your gift note here', 'hwn' ); ?>" value="<?php $value ?>"/>
    </p>

<?php
}
add_action( 'woocommerce_before_add_to_cart_button', 'hwn_add_custom_option');
Limiting the Custom Field To Specific Products
We can make a change to limit the gift note field to only show for specific products by using the $product global variable that WooCommerce makes available to us
function hwn_add_custom_option(){
    global $product;

    if ( $product->get_id() !== 21 ) {
      return;
    }

    $value = filter_input( INPUT_POST, 'iconic-engraving' );
    ?>

    <p>
        <label for="gift_note"><?php _e( 'Gift Note:', 'hwn' ); ?> </label><input type="text" id="gift_note" name="gift_note" placeholder="<?php _e( 'Enter your gift note here', 'hwn' ); ?>" value="<?php $value ?>"/>
    </p>

<?php
}
add_action( 'woocommerce_before_add_to_cart_button', 'hwn_add_custom_option');
Here we check the product’s id and if it’s not 21 (which is the product id of the polo shirt in our example) then we return from the function and no labels or input fields are output to the screen.
You could obviously use different if logic to show the field for different products, or groups of products.
Showing Different Inputs
If we didn’t want to show a text input then we could update the HTML code to show a different type of input, providing the input we add writes a value named “gift_note” to the pages POST collection, then it would work with the remaining code in this article.
Here’s an example using a Select field
function hwn_add_custom_option(){
    global $product;

    if ( $product->get_id() !== 21 ) {
        return;
    }

    $value = filter_input( INPUT_POST, 'iconic-engraving' );
    ?>

    <p>
        <label for="gift_note"><?php _e( 'Gift Note:', 'hwn' ); ?> </label>
        <select id="gift_note" name="gift_note">
            <option value="love_you"<?=$value == 'love_you' ? ' selected="selected"' : '';?>><?php _e( 'I love you', 'hwn' ); ?></option>
            <option value="thanks"<?=$value == 'thanks' ? ' selected="selected"' : '';?>><?php _e( 'Thanks!', 'hwn' ); ?></option>
            <option value="sorry_its_late"<?=$value == 'sorry_its_late' ? ' selected="selected"' : '';?>><?php _e( 'Sorry it\'s late', 'hwn' ); ?></option>
        </select>
    </p>

    <?php
}
add_action( 'woocommerce_before_add_to_cart_button', 'hwn_add_custom_option');
and here’s what it looks like

Just as a side note you may have noticed the logic here
<option value="love_you"<?=$value == 'love_you' ? ' selected="selected"' : '';?>><?php _e( 'I love you', 'hwn' ); ?></option>
This logic will select the option that the user previously had selected prior to page refresh, so if the user chooses “Thanks!” and then adds the product to the cart, the “Thanks!” option will still be selected after the item has been added to the cart.
The code also uses the PHP short tag for echo, which can look a little strange if you’ve never seen it before, you can read more about it here.
Validating the Custom Field
This step is not required to get everything working end-to-end but if we did want to add validation to our gift note field we can do so by hooking into the woocommerce_add_to_cart_validation filter
function hwn_gift_note_add_to_cart_validation( $passed, $product_id, $qty ){

    $value = filter_input( INPUT_POST, 'gift_note' );
    if( !$value ){
        $product = wc_get_product( $product_id );
        wc_add_notice( sprintf( __( '%s cannot be added to the cart until you enter a gift note.', 'hwn' ), $product->get_title() ), 'error' );
        return false;
    }

    return $passed;

}
add_filter( 'woocommerce_add_to_cart_validation', 'hwn_gift_note_add_to_cart_validation', 10, 3 );
Let’s step through the code
- To begin with, we use the WordPress filter_input function to see if we have a value with the key of “gift-note” in the POST variables
- We then check to see if the value is empty (using PHP’s falsey logic), if you wanted to use more complicated validation logic then you could just change the if statement to suit your needs.
- If the value is empty then we retrieve the product details using the wc_get_product WooCommerce function, note that we can’t use the $product global variable as it is not available to this function. We are aware of the product id that we need to use as WooCommerce passes it to the filter function in the $product_id variable
- We then use the product title to display a message telling the user they should add a gift note
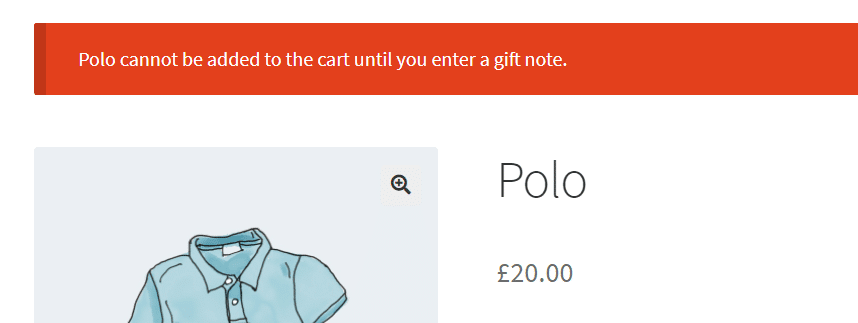
- and pass a false value back to the caller to indicate the validation has failed
- If the user has passed a valid value, then we do nothing and pass back the $passed value, which was passed in by the code that calls the filter
Note that this function would also prevent users from adding products directly to the cart from the shop screen
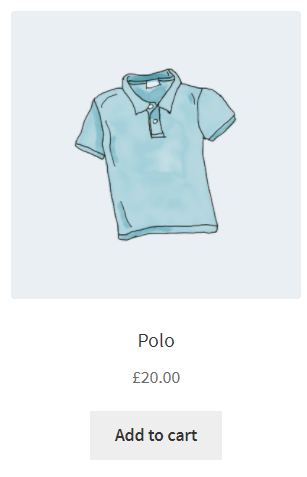
If you wanted to allow users to continue to add products directly to the cart without having to add a gift note then we could add a conditional check to the if within the validation function to ensure the user is on the single product page
function hwn_gift_note_add_to_cart_validation( $passed, $product_id, $qty ){

    $value = filter_input( INPUT_POST, 'gift_note' );
    if( !$value && is_product() ){
        $product = wc_get_product( $product_id );
        wc_add_notice( sprintf( __( '%s cannot be added to the cart until you enter a gift note.', 'hwn' ), $product->get_title() ), 'error' );
        return false;
    }

    return $passed;

}
add_filter( 'woocommerce_add_to_cart_validation', 'hwn_gift_note_add_to_cart_validation', 10, 3 );
Adding the Gift Note to the Cart Item Data
Now we have added the gift note field to the product page we need to intercept the value input by the user and it to the cart item data.
We can do this by hooking into the woocommerce_add_cart_item_data filter.
function hwn_add_gift_note_to_cart( $cart_item_data, $product_id, $variation_id ) {
    $gift_note = filter_input( INPUT_POST, 'gift_note' );

    if ( empty( $gift_note ) ) {
        return $cart_item_data;
    }

    $cart_item_data['gift-note'] = $gift_note;

    return $cart_item_data;
}
add_filter( 'woocommerce_add_cart_item_data', 'hwn_add_gift_note_to_cart', 10, 3 );
Here’s what we’re doing in the function
- We firstly use PHP’s filter_input function to get the “gift-note” value key from the POST collection, this should be the value the user entered when adding the product to the cart
- If we can’t find a value for “gift-note” then we take no further action and return the $cart_item_data variable unchanged
- If we do find a value then we add a key-value pair to the $cart_item_data with the key “gift-note” and the value that was entered into the “gift-note” field
- We now return the modified $cart_item_data and the WooCommerce core will add it to the cart
Displaying the Gift Note Data in the Cart
Our gift note data has now been added to the cart but it won’t display anywhere, to get it to display in the in pre checkout screen we need to hook into the “woocommerce_get_item_data” filter
function hwn_get_gift_note_item_data( $item_data, $cart_item ) {

    if ( isset( $cart_item['gift-note'] ) ){
        $item_data[] = array(
            'key' => __( 'Gift Note', 'hwn' ),
            'display' => wc_clean($cart_item['gift-note'])
        );
    }

    return $item_data;

}
add_filter( 'woocommerce_get_item_data', 'hwn_get_gift_note_item_data', 10, 2 );
The first thing we do in this code is to check to see if the “gift-note” key we added via the woocommerce_add_cart_item_data is present, if it is then we add a new key-value pair to the $item_data array with the following values
- key – this will be the name of our item, so in this case, we use the text “Gift Note”
- display – this is the value of our item, so we pass in the “gift-note” value from the $cart_item array
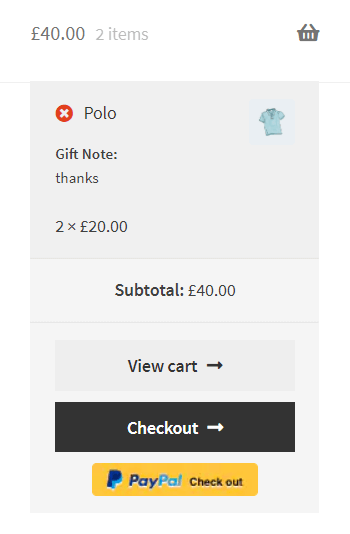
We should now see the gift note value displayed on the main cart page
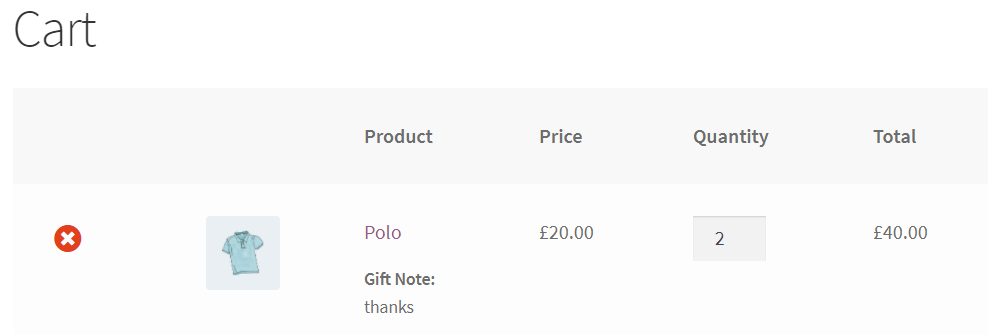
and the mini cart
Adding the Gift Note Data to an Order Line Item
Now the data is displaying n the cart we need to get it to display in the post order screen, we can do this by hooking into the woocommerce_checkout_create_order_line_item action
function hwn_add_gift_note_to_order_line_item( $order_item, $cart_item_key, $cart_item_values ) {

    if ( ! empty( $cart_item_values['gift-note'] ) ) {
        $order_item->add_meta_data( __( 'Gift Note', 'hwn' ), $cart_item_values [ 'gift-note' ]);
    }

}
add_action( 'woocommerce_checkout_create_order_line_item', 'hwn_add_gift_note_to_order_line_item', 10, 3 );
In this function, we check to see if there is a “gift-note” value in the $cart_item_values array, if there is a value then we add the data to the order item metadata via the add_meta_data function. We pass the following values to the function
- The name of the item, in this case, we pass “Gift Note”
- The value of the item, for this, we pass the “gift-note” value that we have written to the cart item data in previous steps
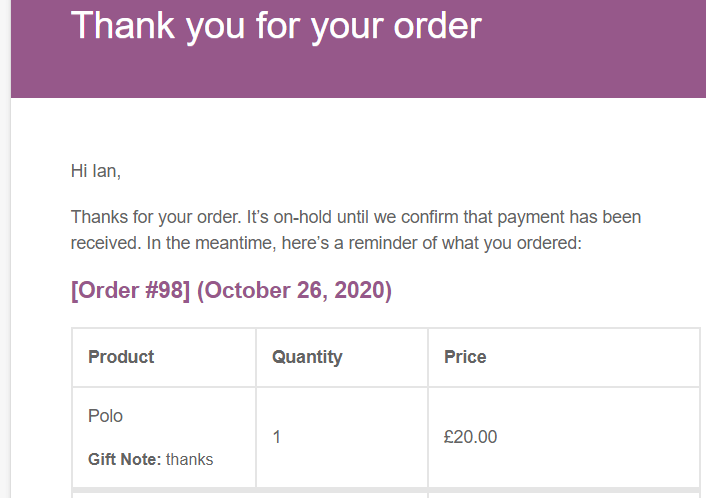
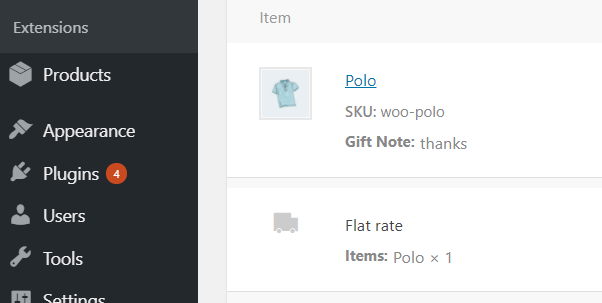
The gift note value should now start to appear in all the post order screens and emails
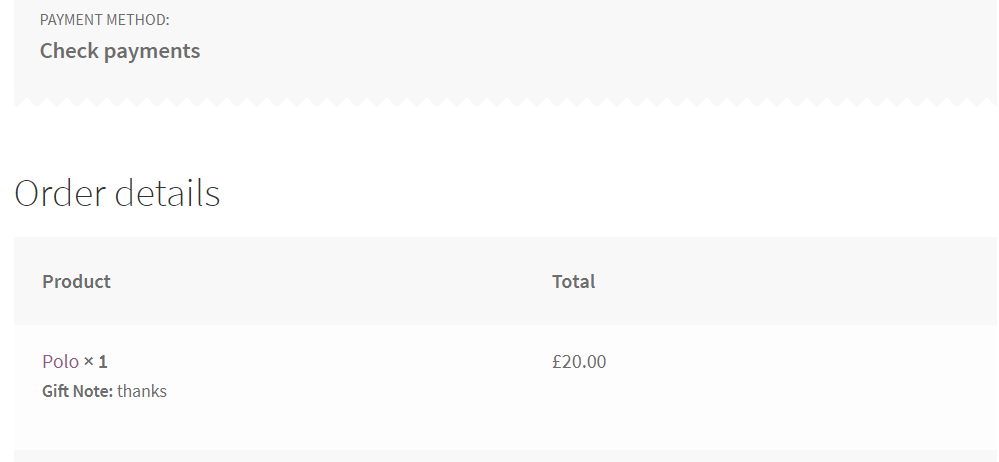
Here it is in the order email
and also in the admin “Order” screens
Conclusion
Often clients will ask for custom fields and logic to be added products in WooCommerce stores, hopefully, the snippets above will allow you to add the custom logic you require.
Click here for more details about the "Learning WooCommerce Development By Example" book
If you have any questions or queries then please don’t hesitate to let us know in the comments.

